Building an Arcade Style Controller
This story starts at the beginning of the story, which happens to be May 1st. May 1st is the day after my birthday, and my parents decided to take me to an electronics store, as a treat! In the electronics store there were many cool things, but what drew my attention the most were these cute arcade buttons and joystick. Something about the arcade aesthetic just draws me in. From the moment I saw those buttons I decided "I HAVE to at least try to make a controller with these".

I was very excited to start this project, as it seemed to be within my current electronics skills! (Foreshadowing)
The first thing I did was modelling. It's split into four parts, the joy stick top panel and bottom shell, and the buttons top panel and bottom shell. At first I tried to use freeCAD since I need to learn CAD, but I got frustrated, did some research and found that freeCAD is actually pretty hated. After that I just went back to blender and was able to finish modelling painlessly.
The button arrangement was an interesting challenge, as the buttons were too large for my fingers to spread onto them in a row. Here were my two attempts, with the second working pretty well.

The first one was made by putting my hand on a piece of paper and getting the coordinates of where my fingers touch the page in centimeters. Turns out my hand posture wasn't very natural, and my fingers were too close together. The second attempt has 4 main buttons, thumb in the bottom left, pointer top left, ring and middle in the center and then pinky on the right. Then near my pointer and thumb, there are two buttons. These will be for less common actions.
I also ran into a problem with sizing the holes, and had to go through two iterations before I bit the bullet and designed a smaller test print to test the hole size. I really am stupid. There was no good reason to waste those hours a second time.
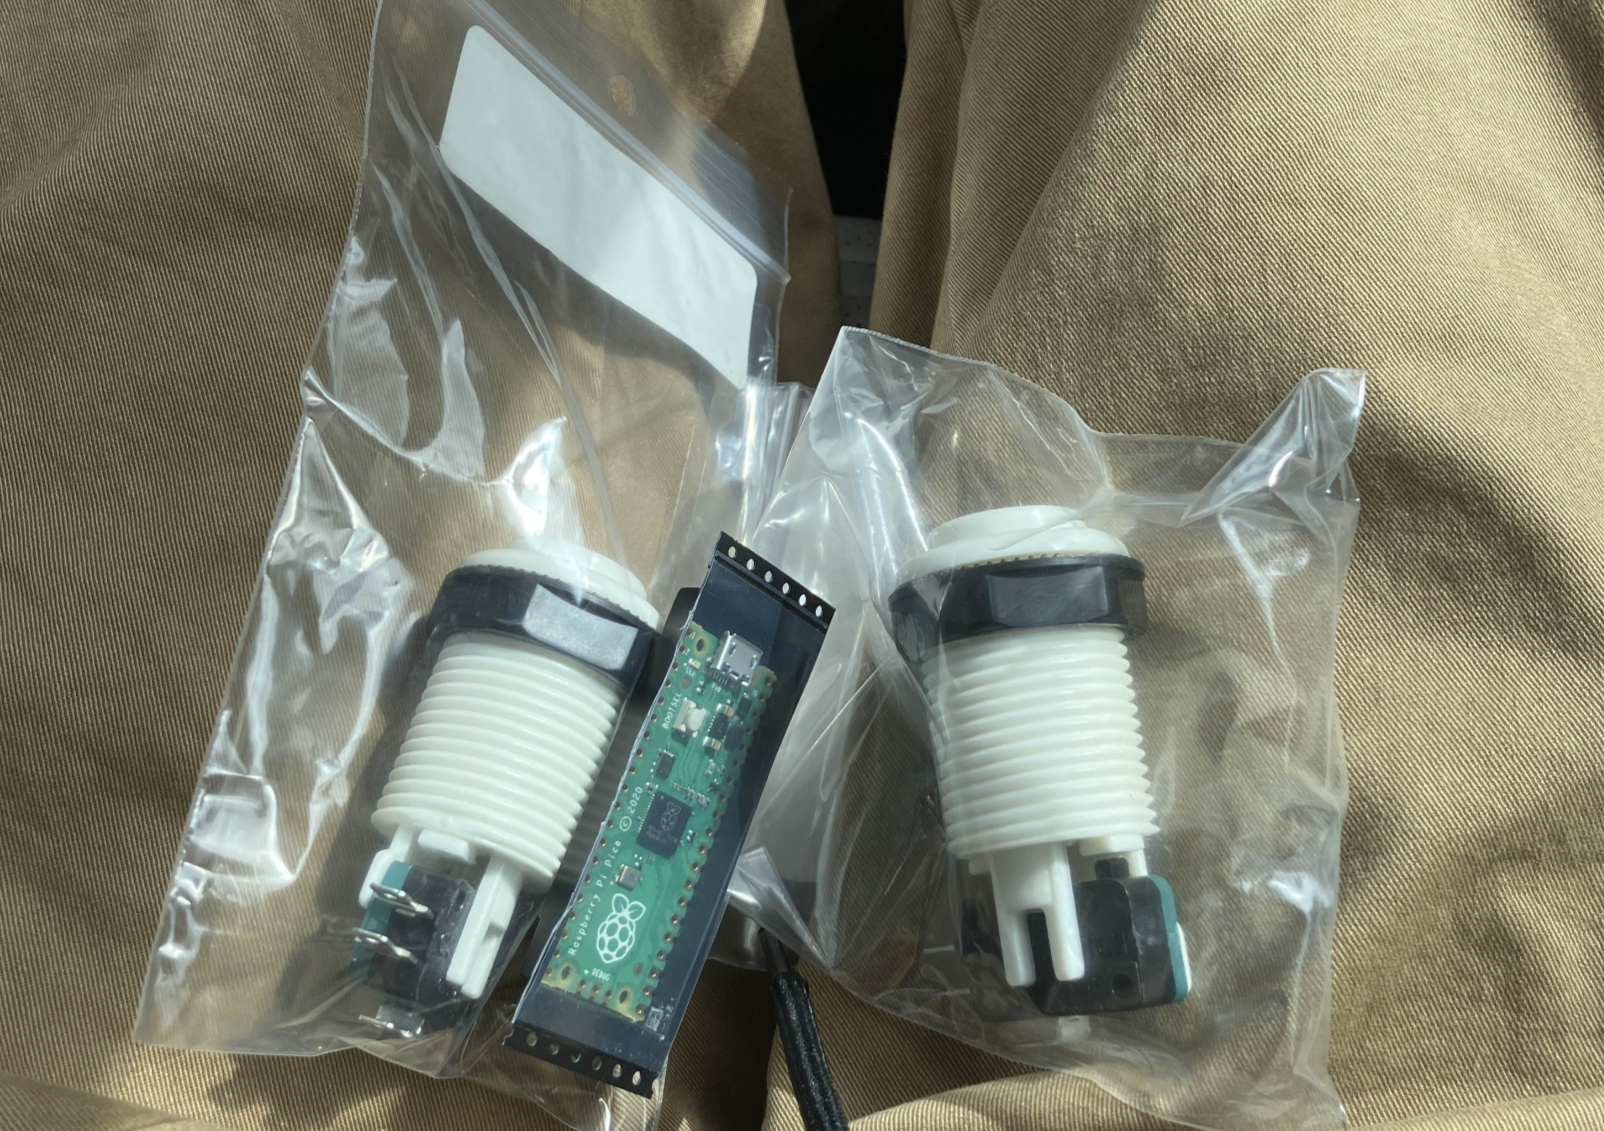
You might notice: "hey, the first picture showed 4 buttons, but that panel has 6 holes!" and you're absolutely right. Back to the store I went for two more buttons, and a micro controller. I got a raspberry pi pico. This second trip has a lesson to be learned from: plan out your projects, don't find products and immediately get inspired. actually think through everything before leaving the store. I could've realized 4 buttons weren't enough, and that I'd need a micro controller.
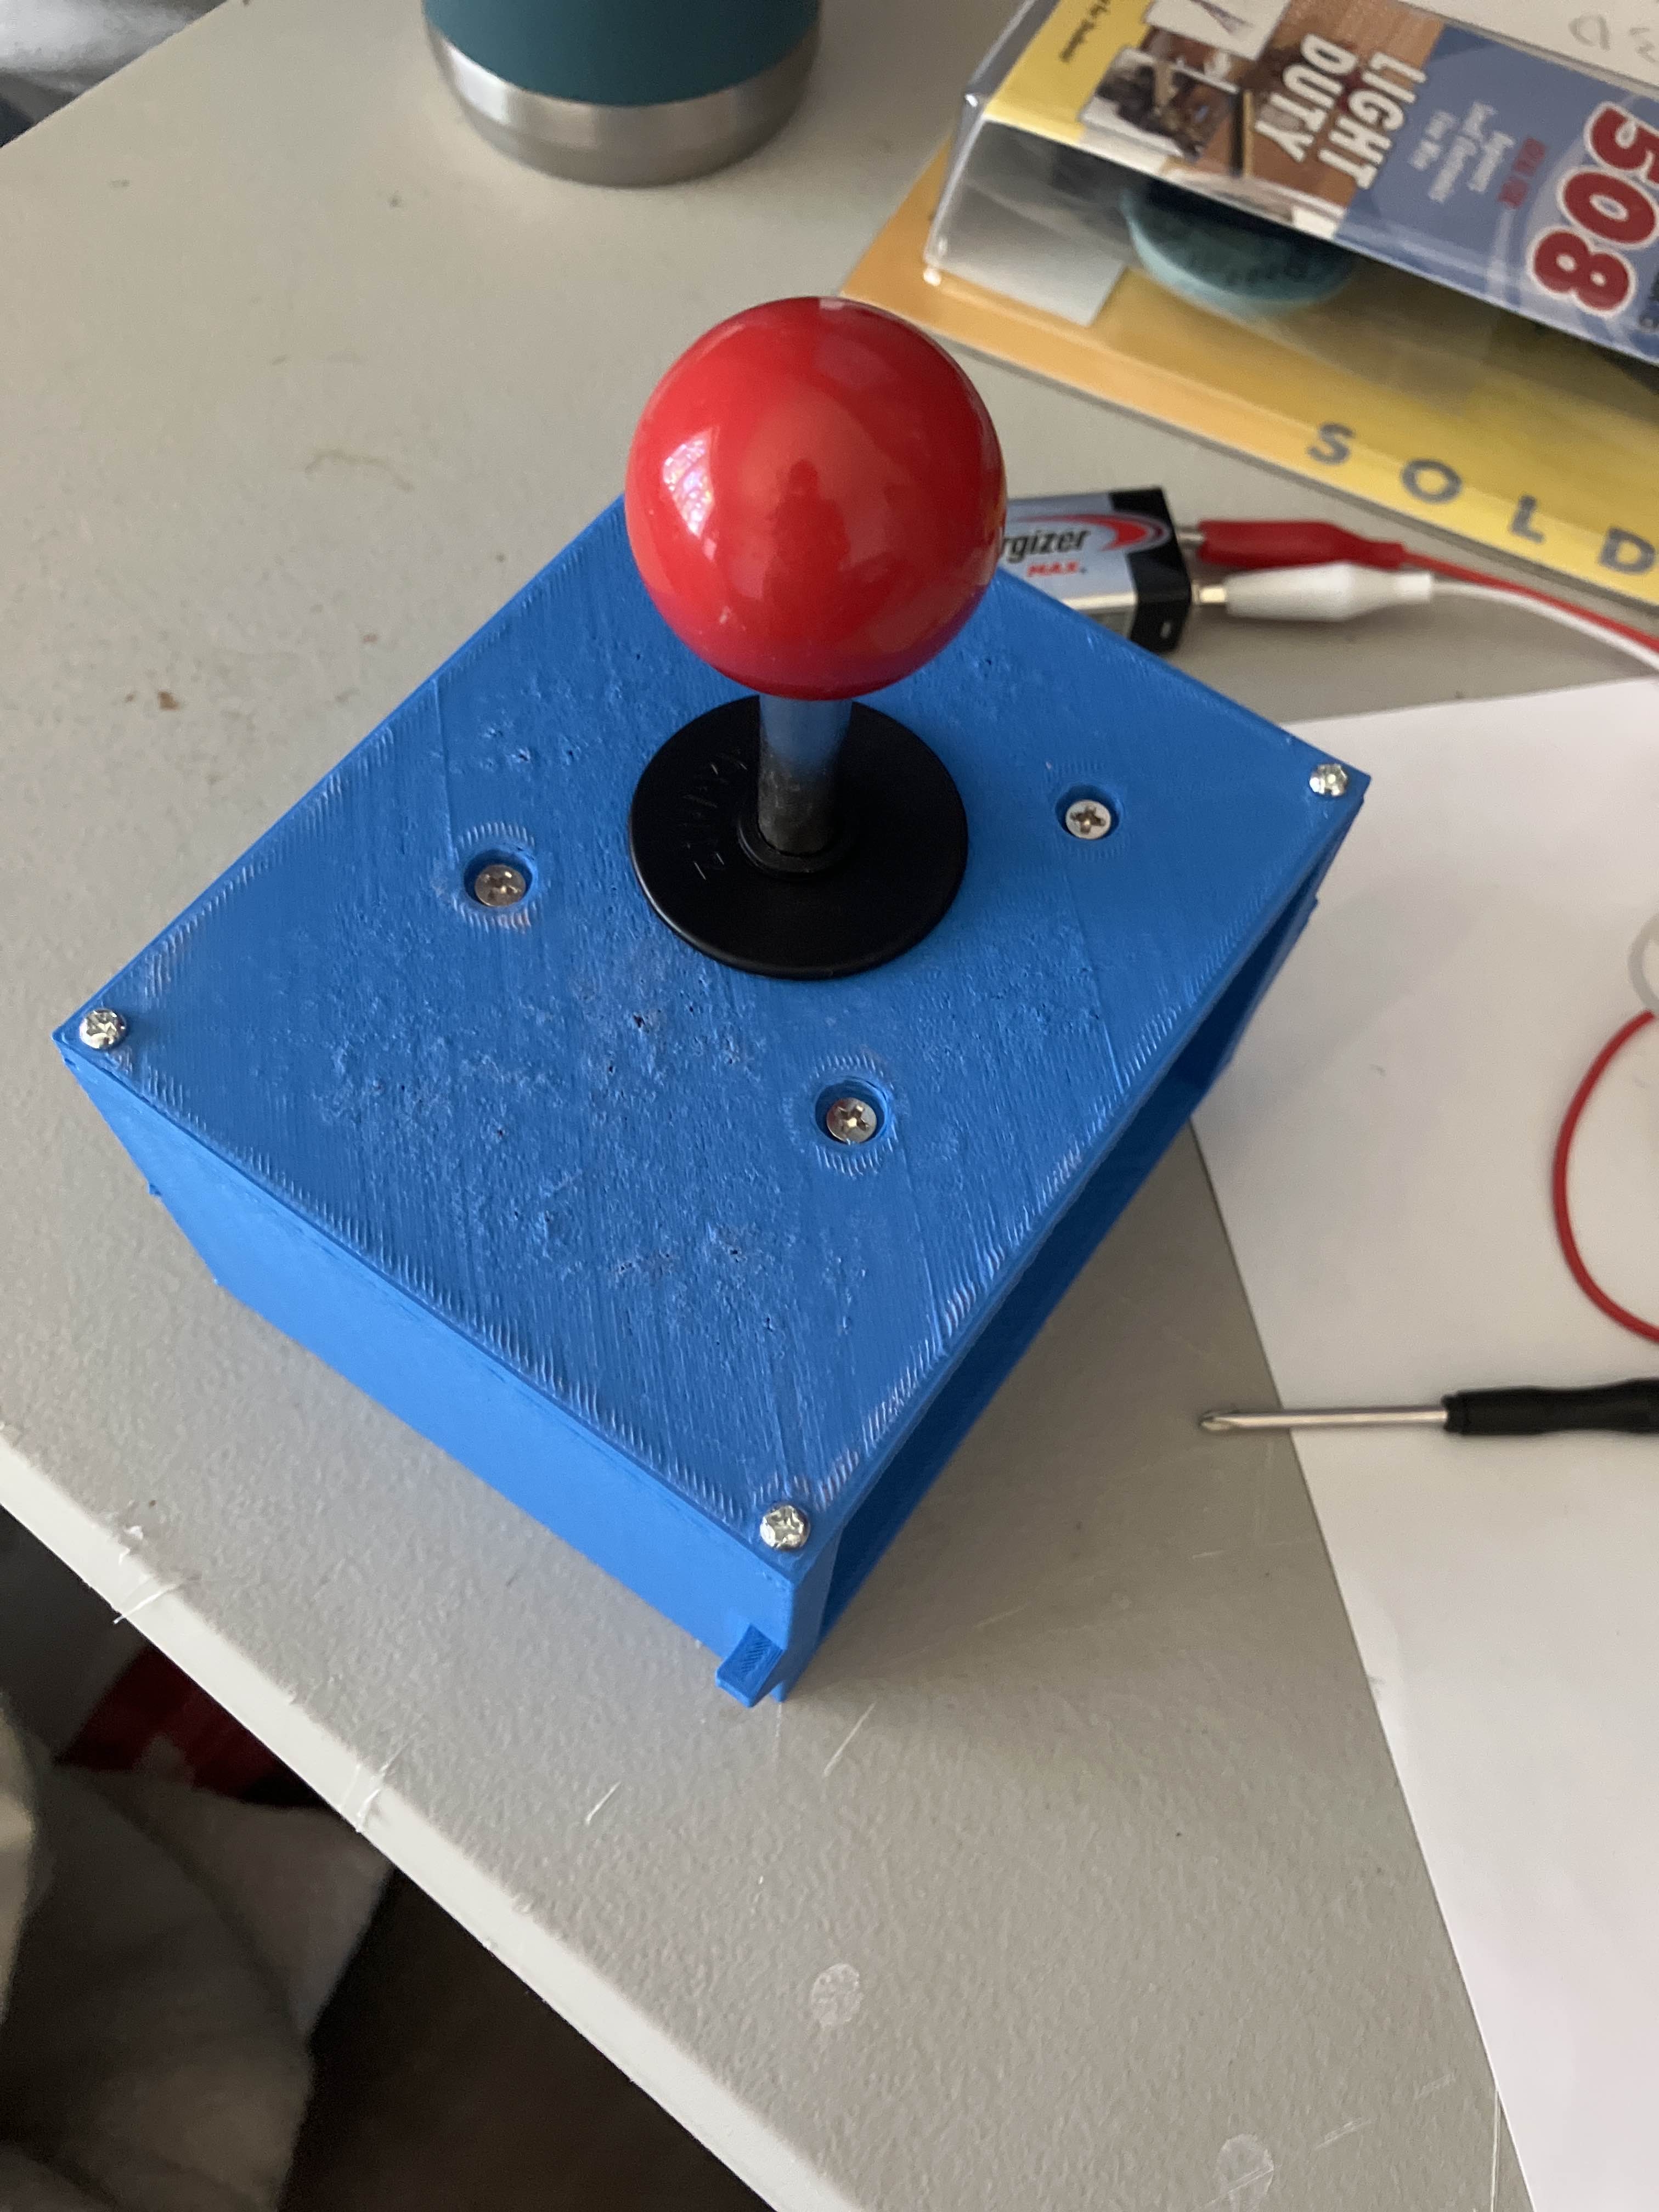
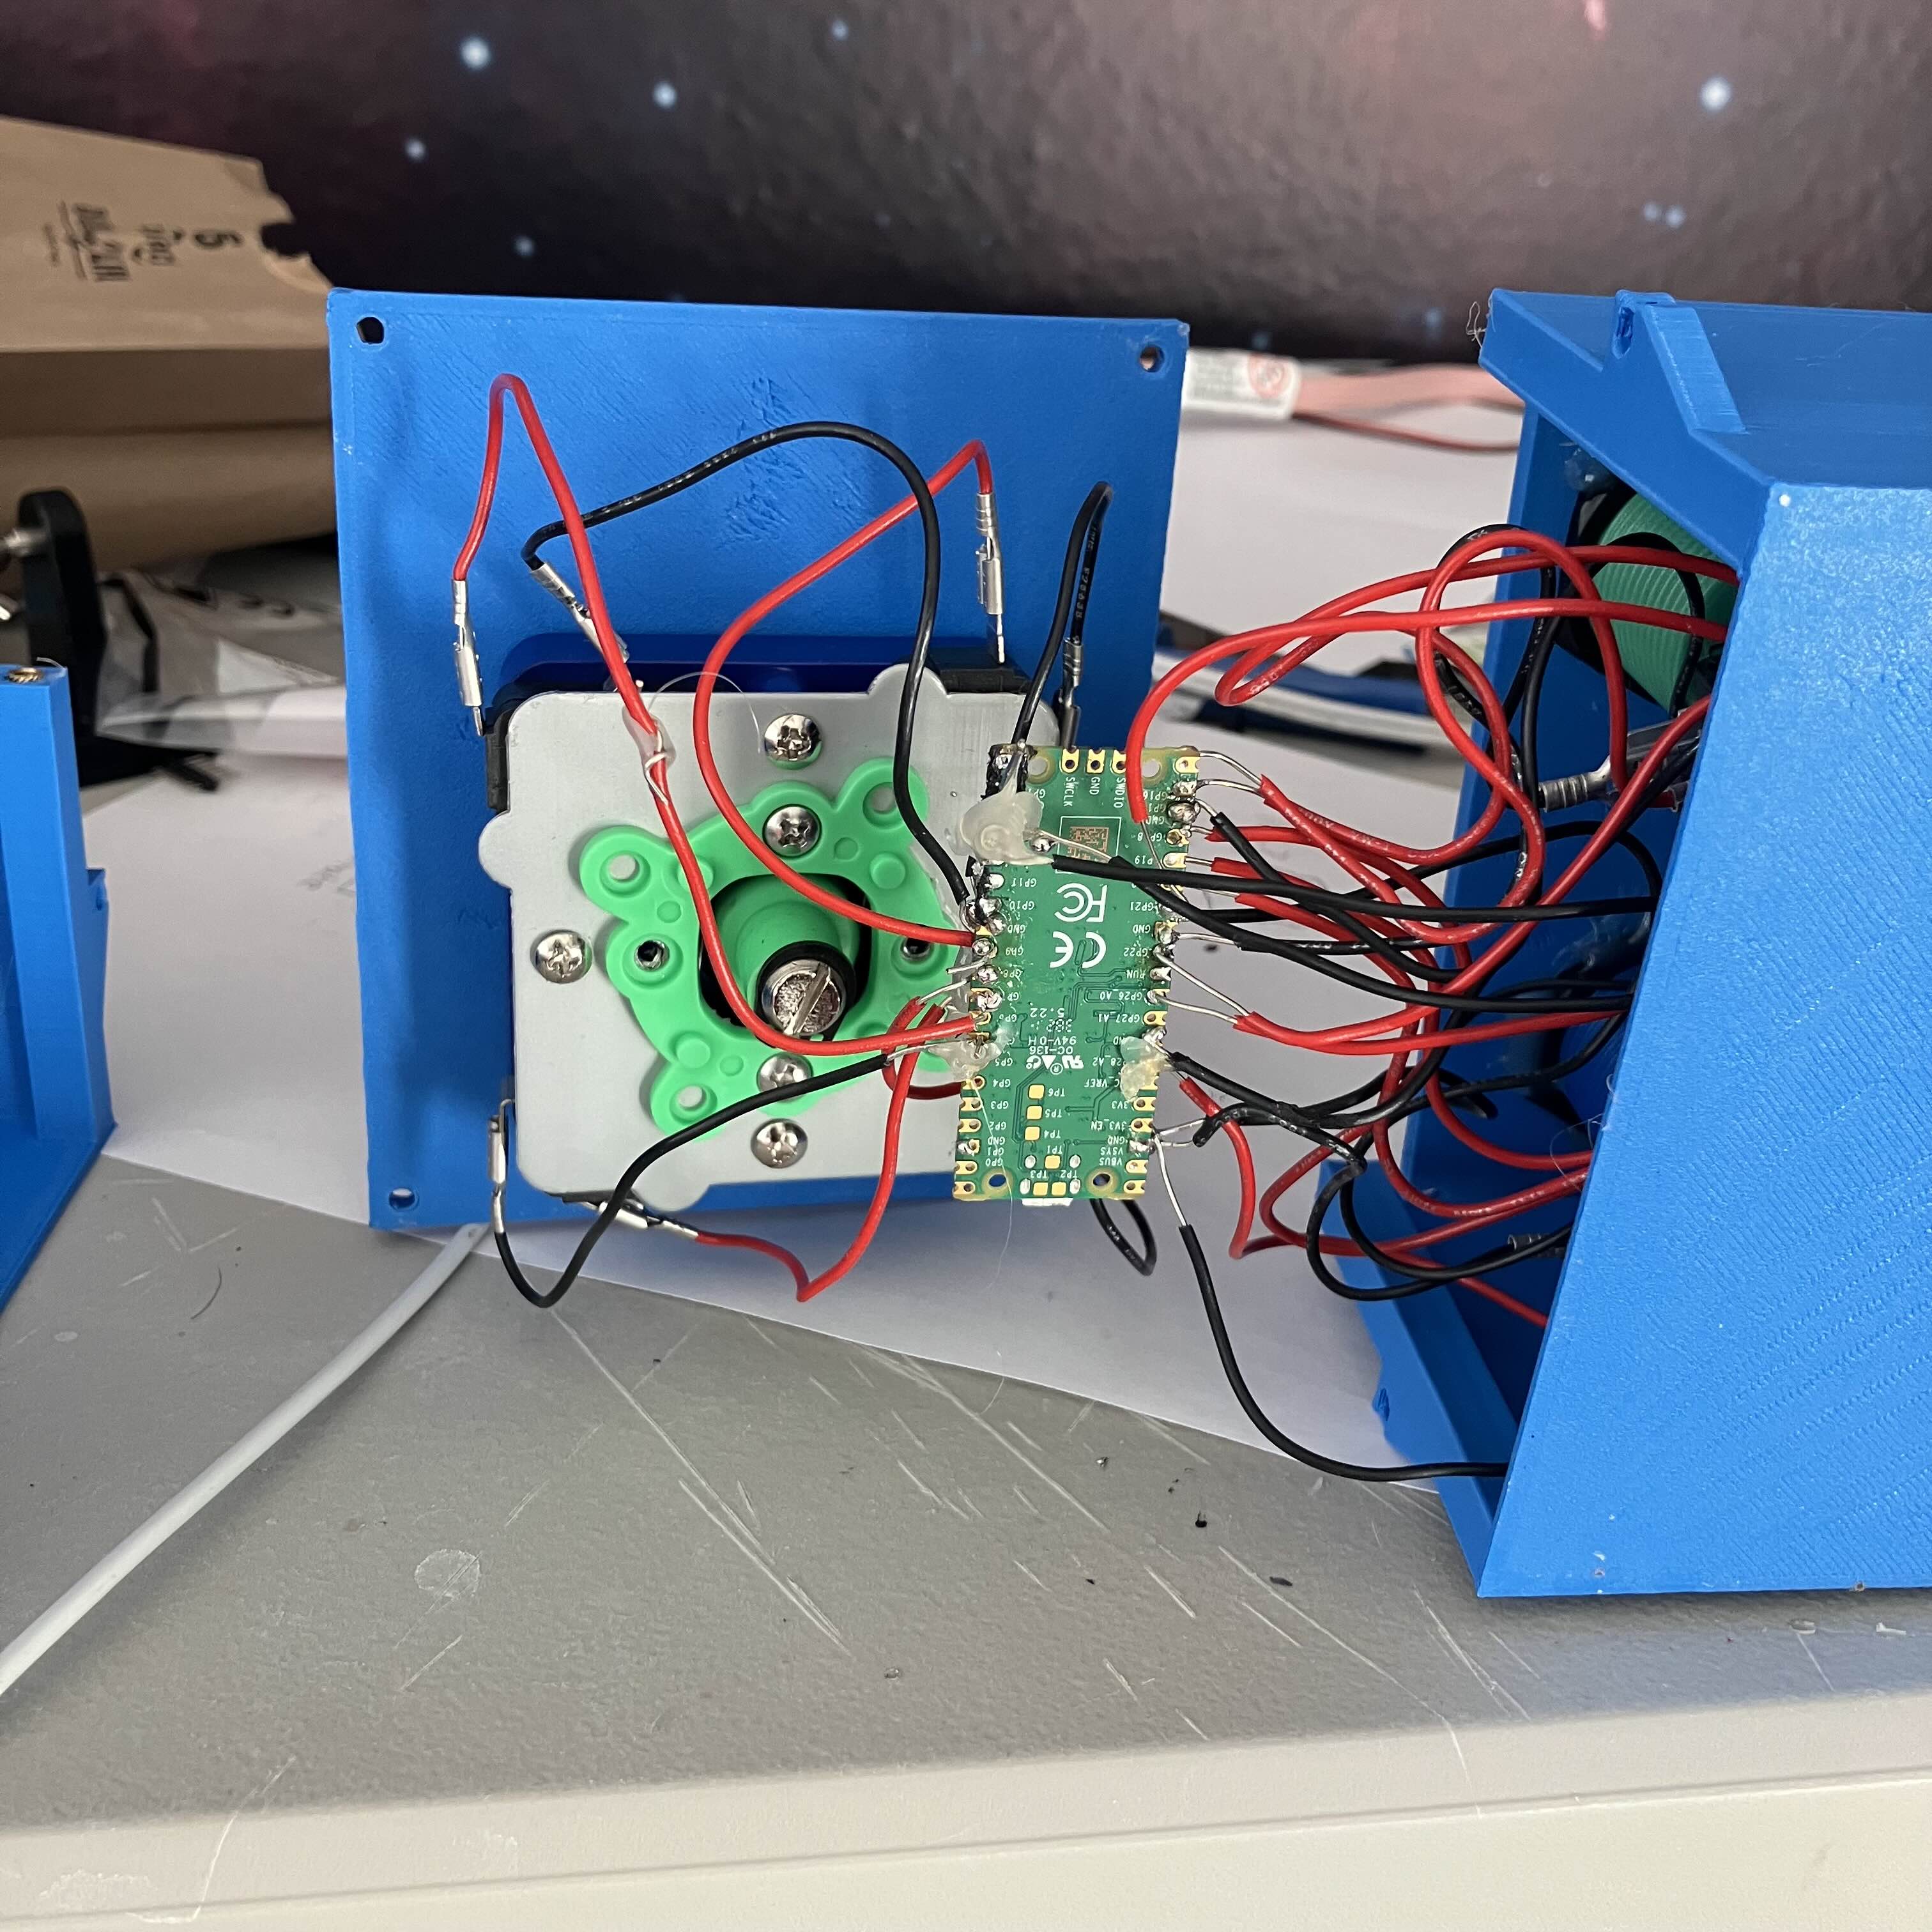
This picture was from in the car heading home. Also, I quickly designed the left half (the side that contains the joystick) and it wasn't too hard. I unscrewed the metal plate from the joystick and used the screw holes to attach to my box, giving me this. I was worried that the device would be too light for how much torque it takes to move the joystick, but even as this hollow half it barely moves, so that's good!
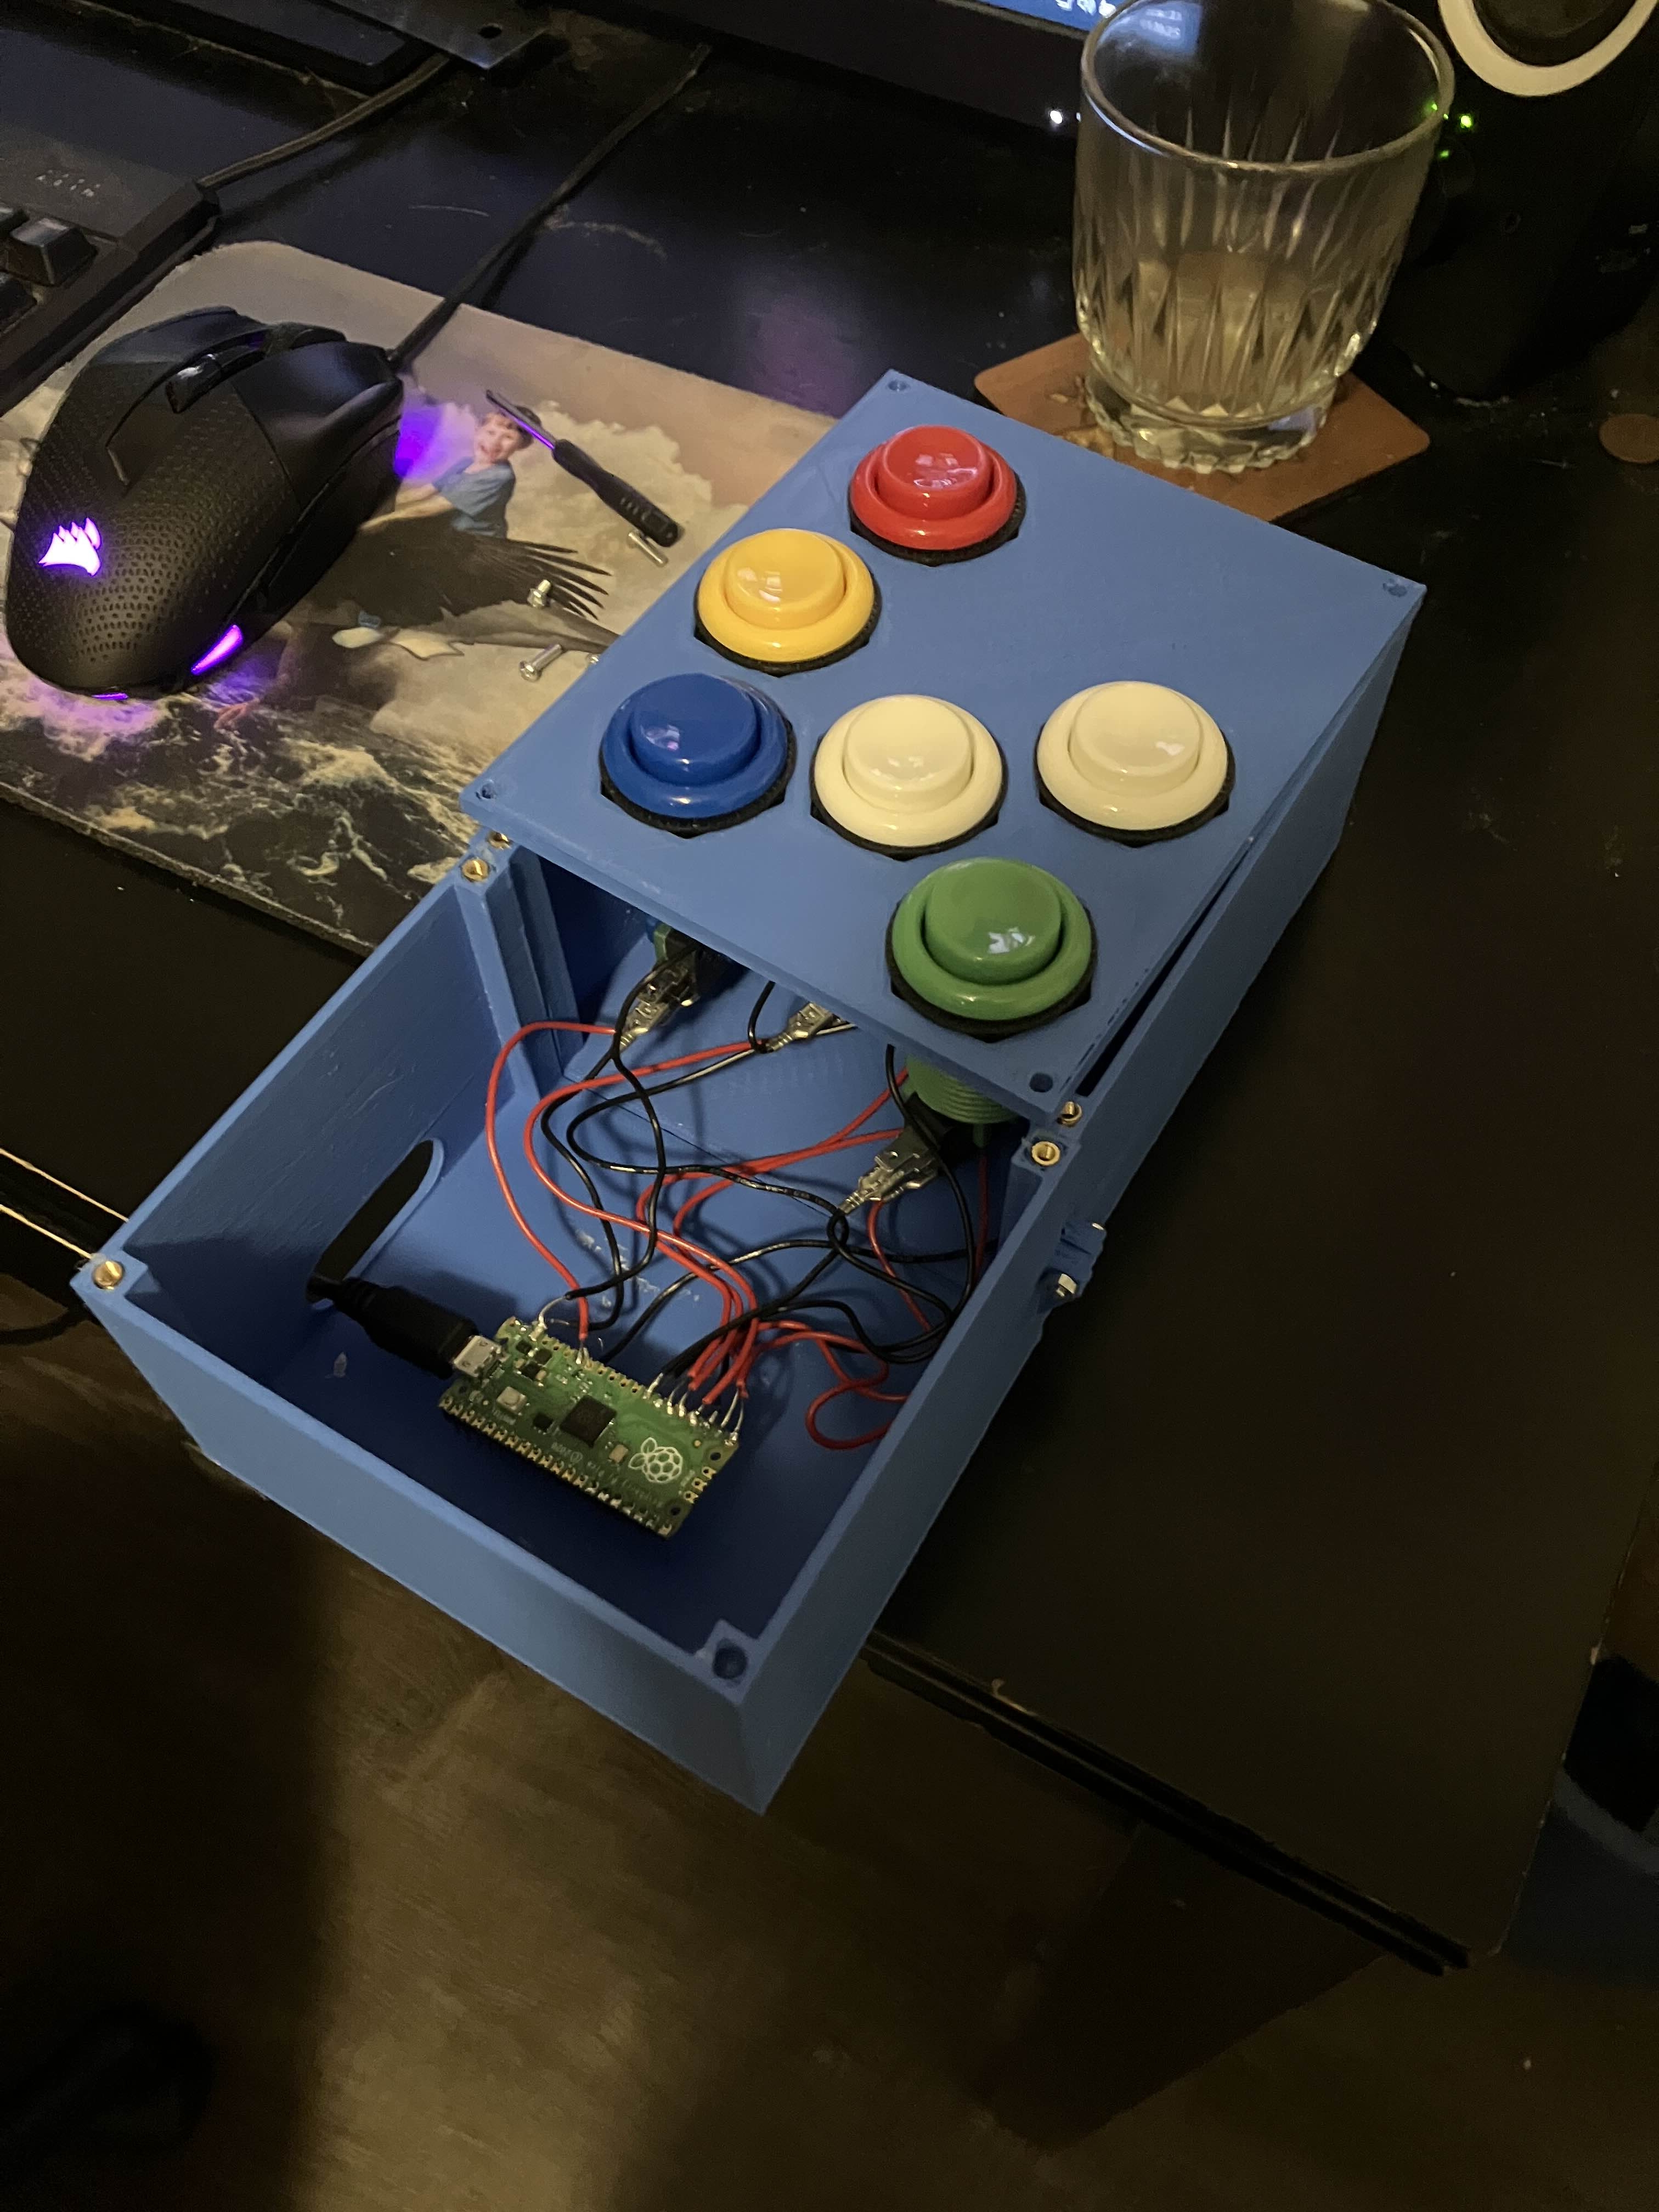
I also had the idea of using 3 switches (switches I already had) to give 8 different input maps, so there are 3 holes in the model of the button half. Anyway, with all of this, I can fully assemble the controller for the first time. It looks finished but right now has no way to be used as a controller, lol.
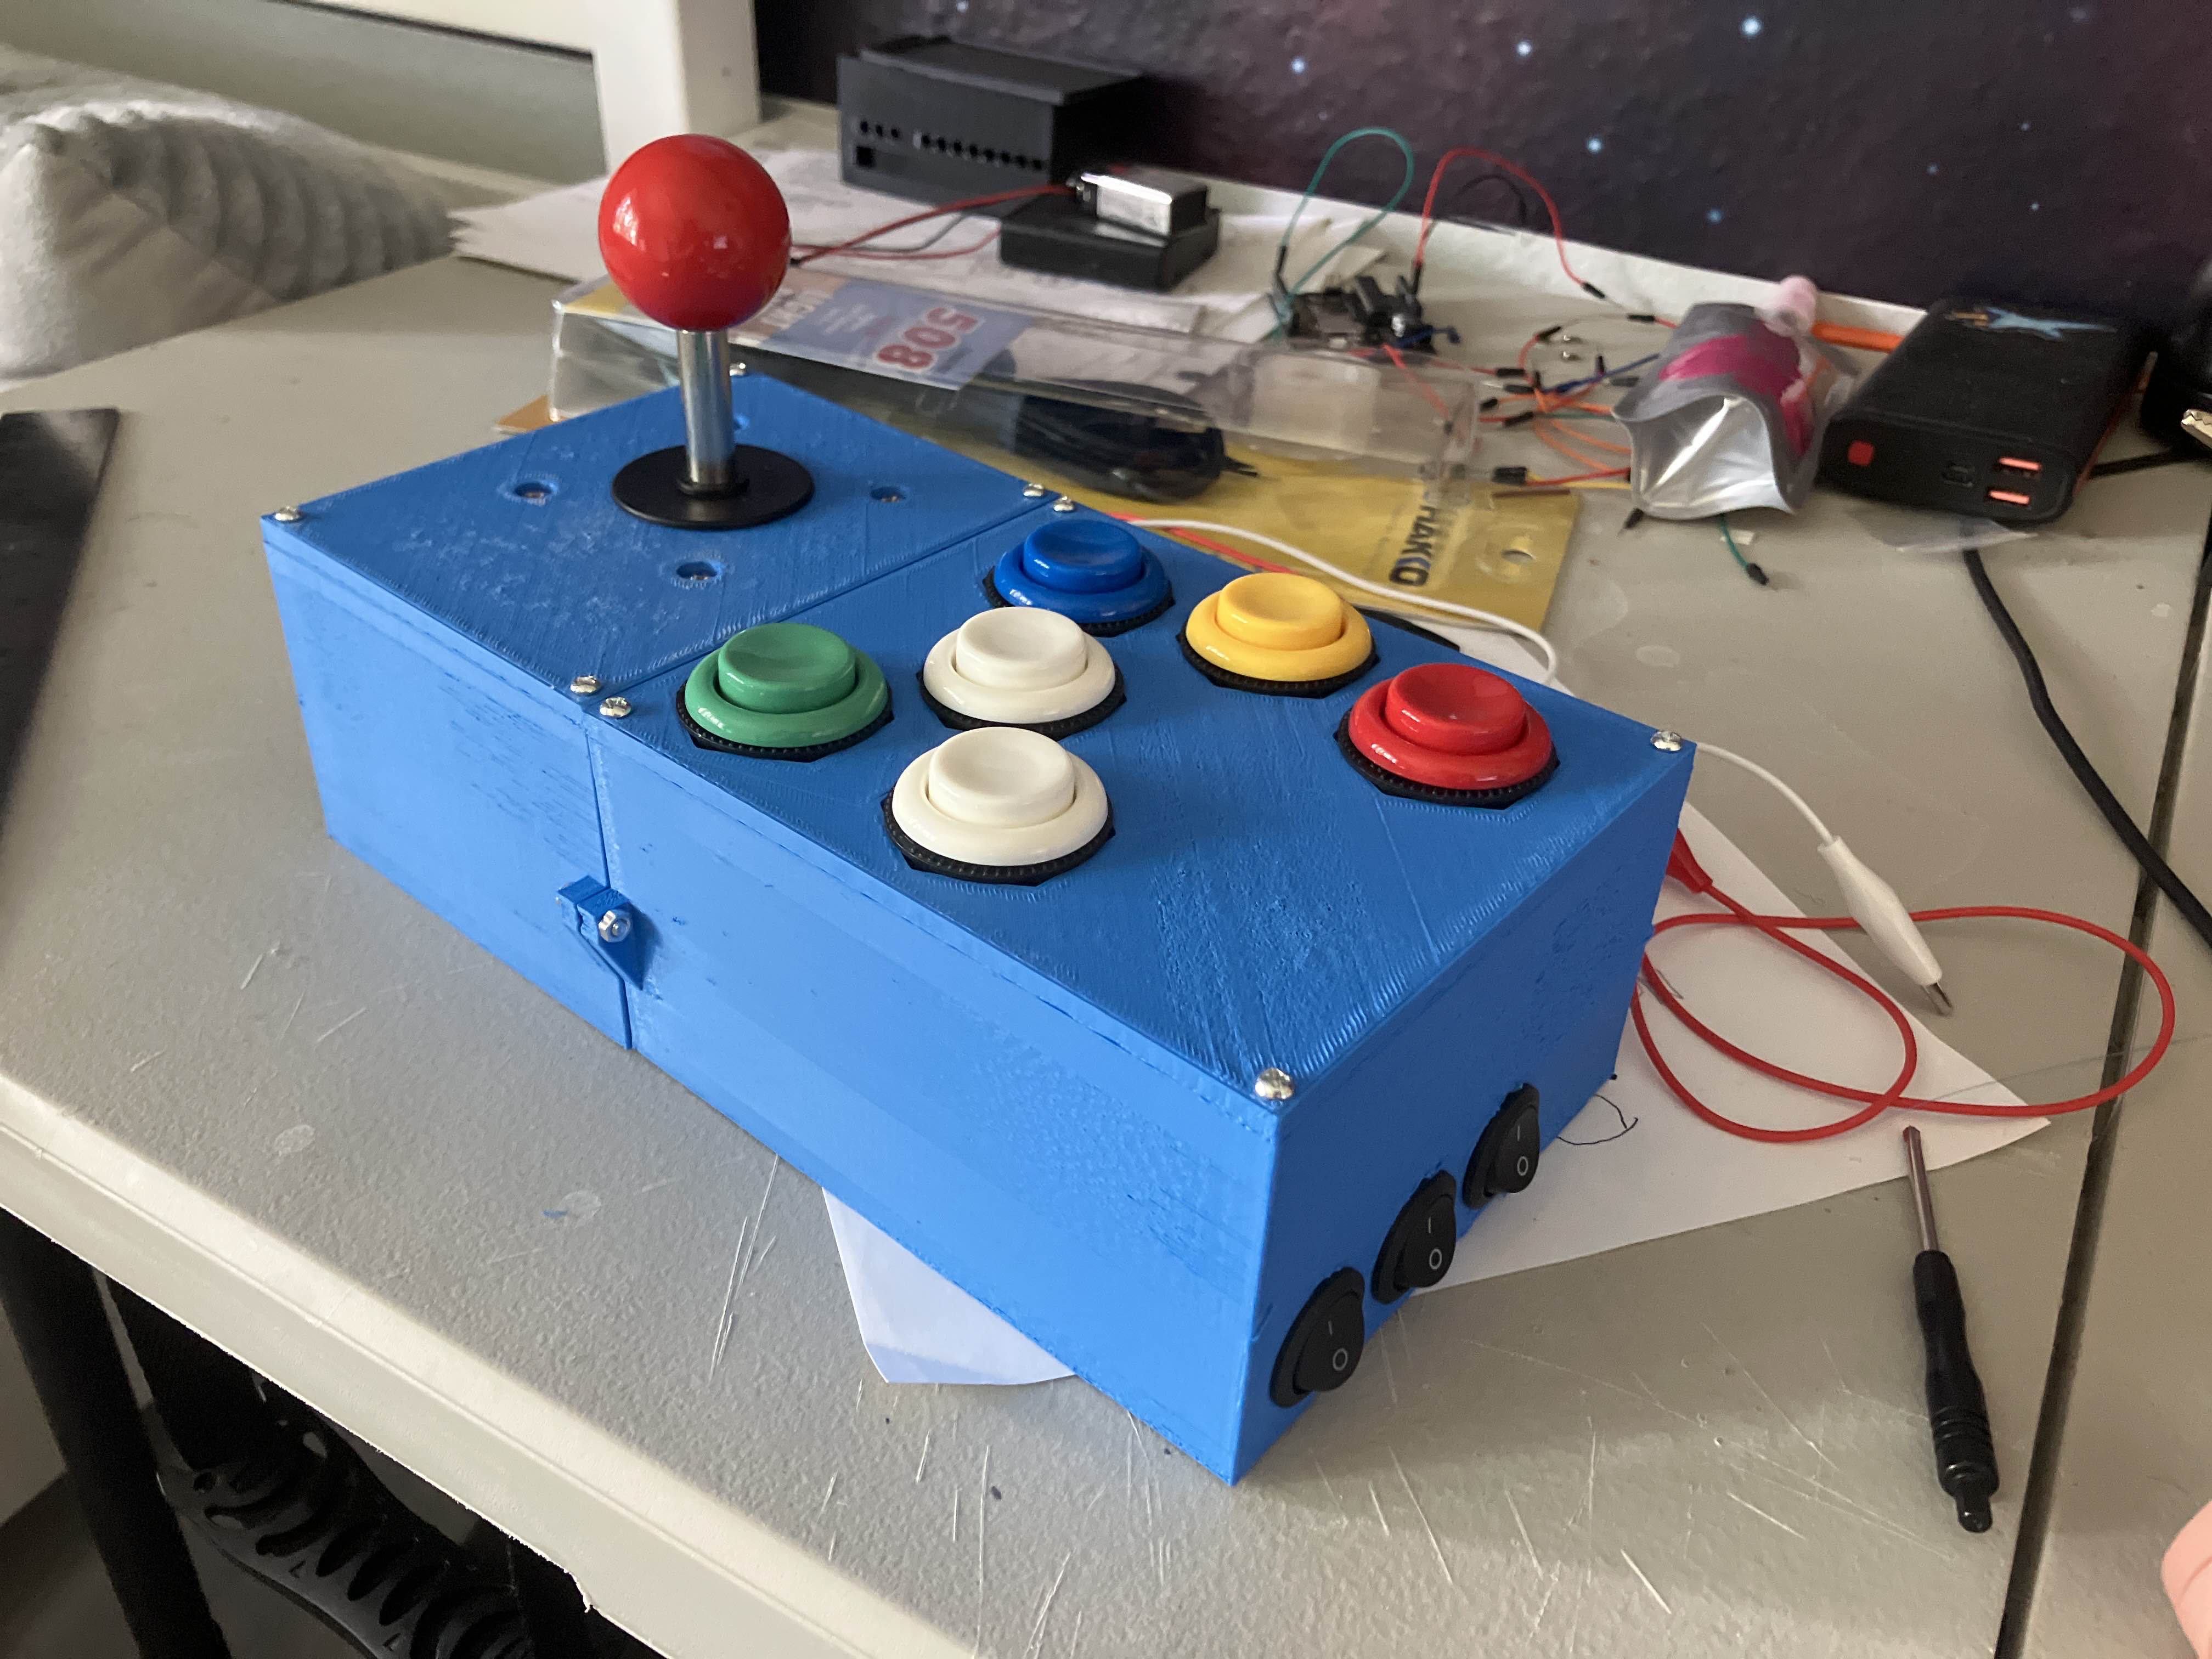
I am really happy with how this project looks so far! Trying it out in the hands, it feels about how I expected. Notice how the joystick isn't centered, it's pushed forward a bit. This is intentional, to give more wrist room. Everything is going to plan right now. Now to code the pi pico. This should be the easiest part of the project, right?
Right...?
Of course not, how foolish of me! Getting it to connect and get a blinking led hello world was pretty easy, but trying to get it to be recognized as a gamepad was impossible. No really, after 4 hours I gave up and decided having it be recognized as keyboard is fine. Luckily, the pi pico didn't give me much more shit for the rest of the project. It did do an annoying thing later where there weren't any match statements, and it uses python (ew), but other than that the programming of this project was about as easy as I was expecting. I just went through a bit of command line hell trying to get the pico recognized as a gamepad.
That night, at 02:00, I decided to try soldering some of the buttons, to make up for lost time on trying to get the gamepad working. But the solder just wouldn't stick to the button's terminal, nor the wire. This was very frustrating, but I kept trying until I heard an ominous sizzle. Suddenly, the terminal of the button sagged down. I got a sinking feeling as I reached for my tweezers. I gave the terminal a wiggle. Completely flaccid.
I clicked the button a few times. It was disgustingly mushy, it lacked the click that made me fall in love with it. I had fried the green button. Now I have two problems, number 1 I'm missing a button, and number 10 how do I connect these buttons to the pico?!

My first idea was to do the most terrible obvious thing, and use a buttload of alligator wires. I didn't have enough, but I did get the joystick working through this method. Problem: everything absolutely would NOT fit back in the box. On the right is a crappily recorded video, which doesn't work in the VSCode preview, but does work on firefox, so uh I hope this works and you can watch it. In the video I'm playing Arena4D, a game I've been working on. I should write a webpage on it, I should write a webpage on a LOT of things, actually... wow I really need to get back to posting to my website.
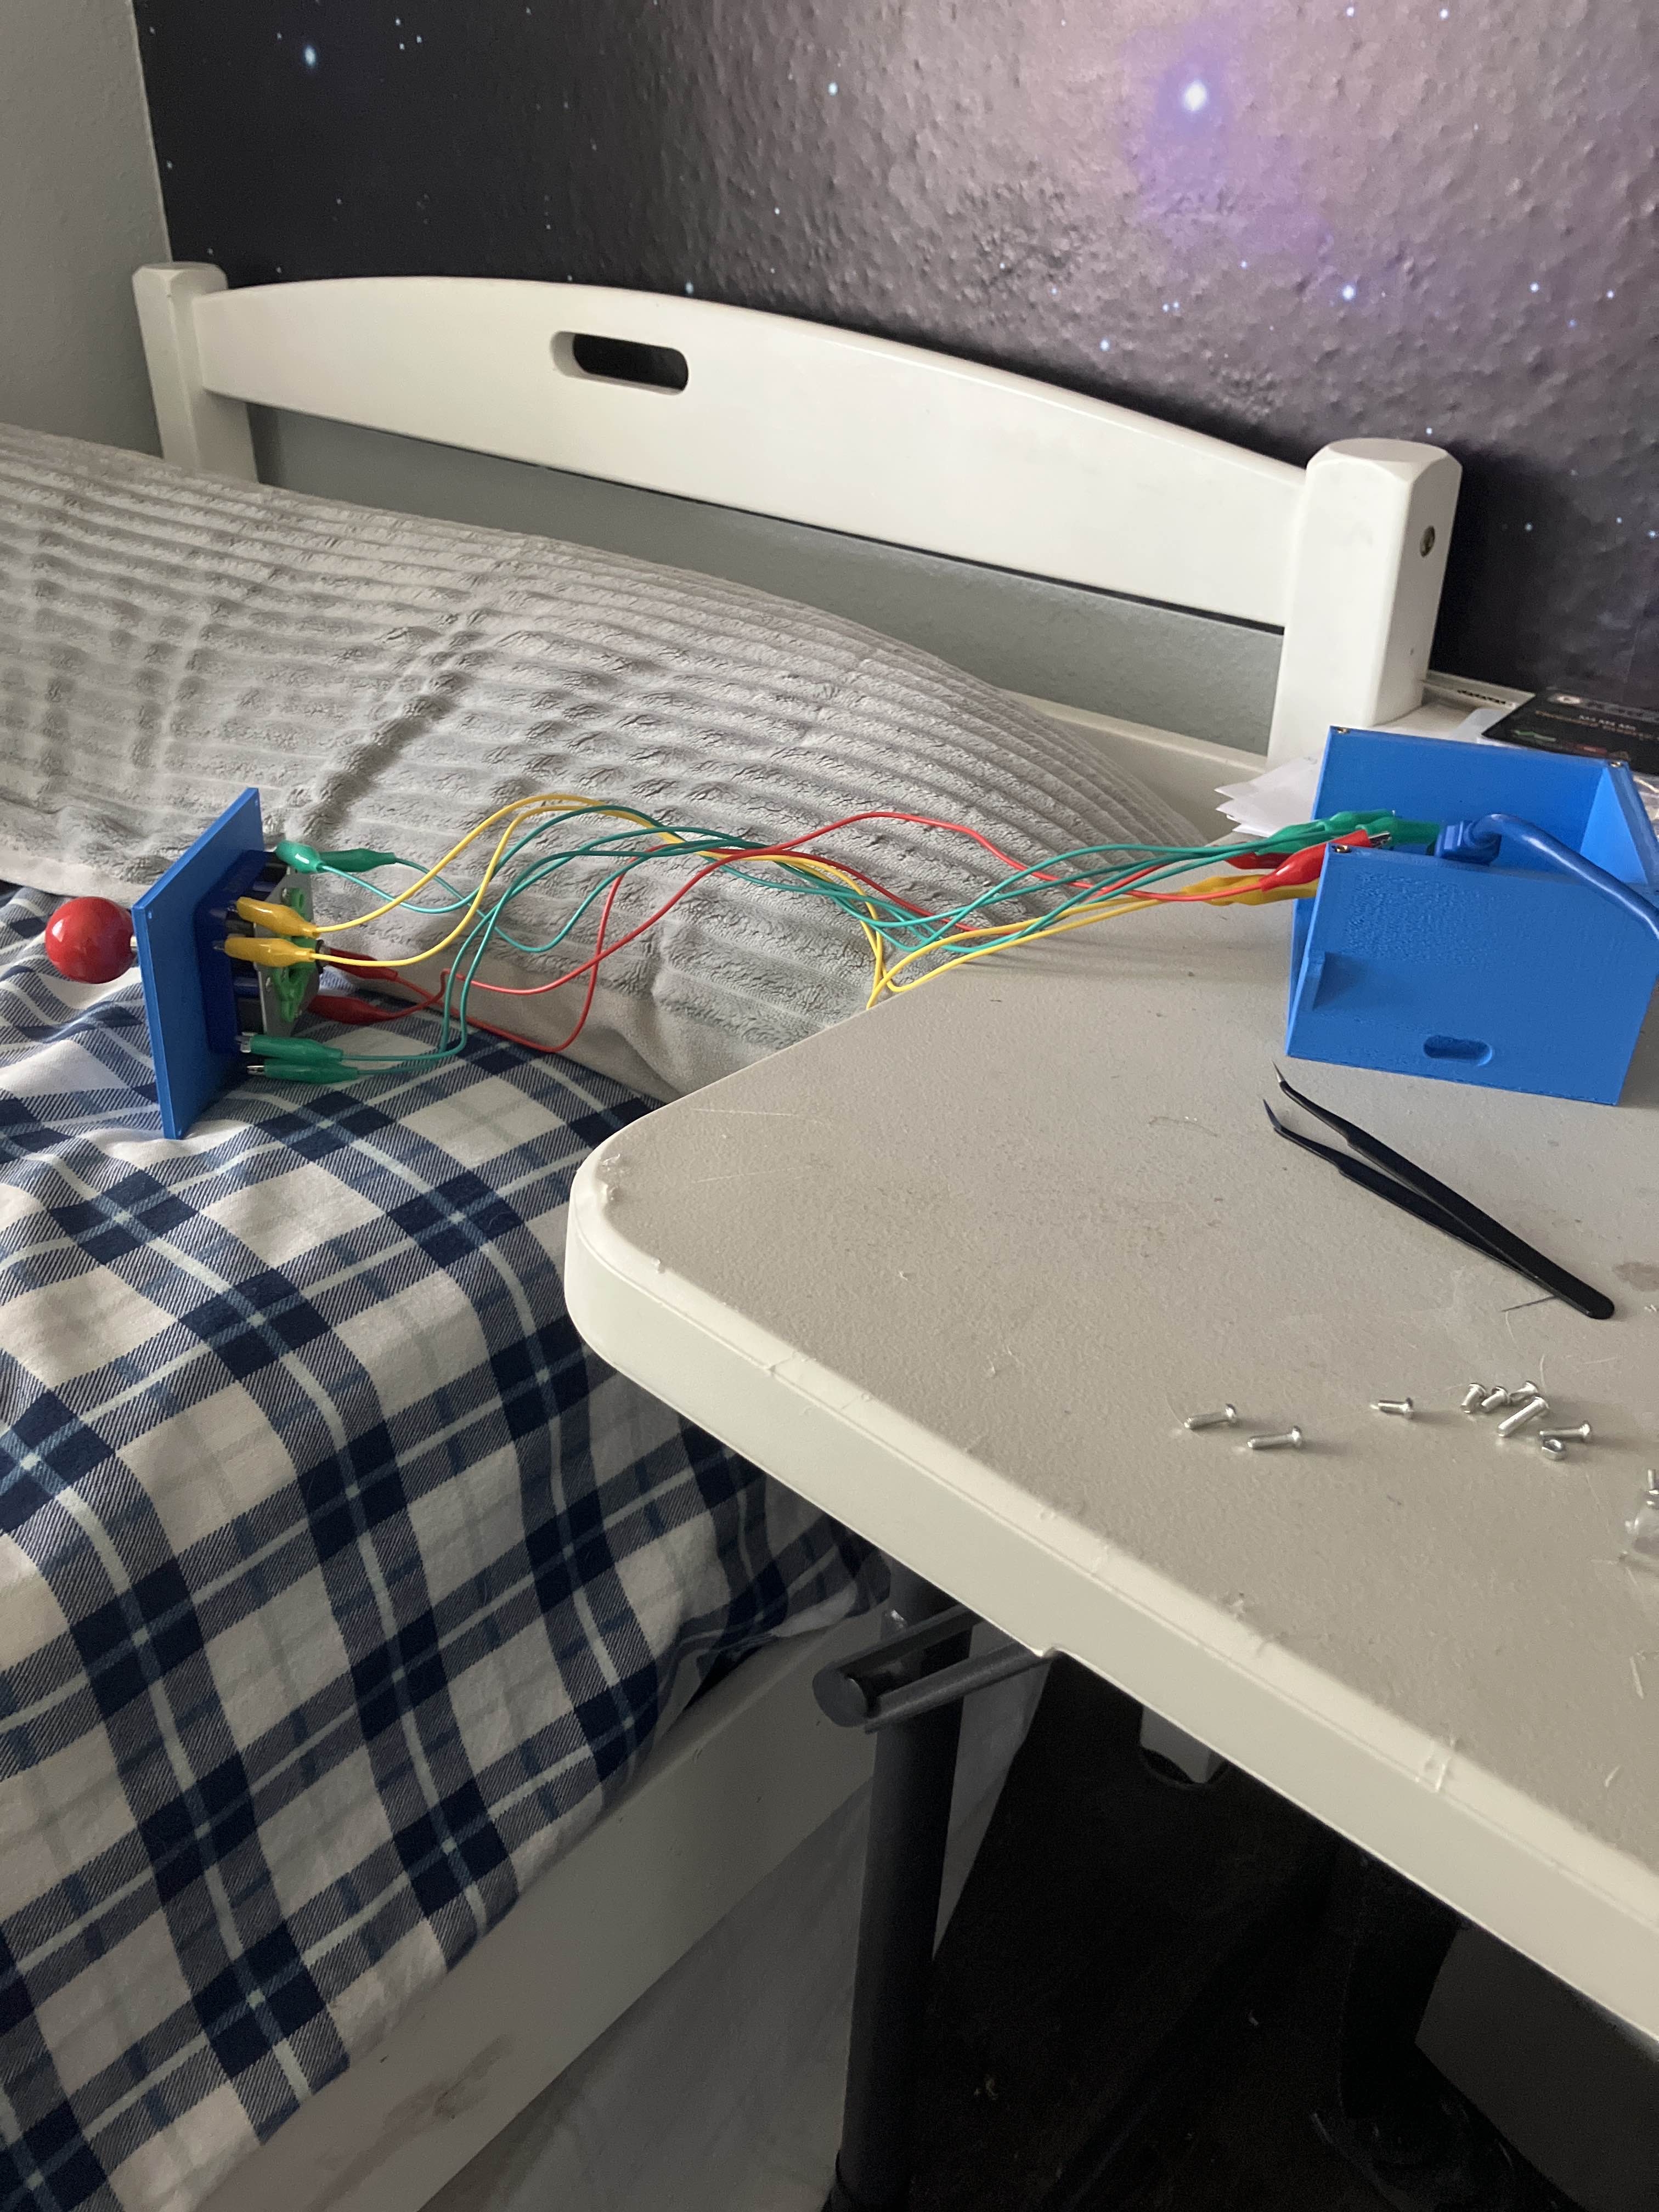
Anyway this is a retarded way to do things, because it takes a lot of space and the alligator clips love disconnecting themselves. I did some "research" (asking people on discord for help) and kind of got closer to what I needed. I just decided to go back to the store for a third time. But alas! The store was closed for the next two days. I had nothing to do for those two days but desparately wanted to work on the project so I assembled it again, out of boredom. No point, I'd have to dissasemble it, but- actually wait no there is a point, it makes my desk cleaner.
Monday
Well, today is the day! It's a little embarrassing to go to the same store 3 times in the same week, but it's really hard to predict what you need when you get into a project that's out of your comfort zone. They were out of green arcade buttons, but that's okay they had the button core, which can be easily swapped out of the unharmed green button shell. I also got some solid core wire and a crimping tool. For the next 3 hours I made the wires I needed and connected them to the parts. Wow, using the right tools is AWESOME! This is exactly what I needed!
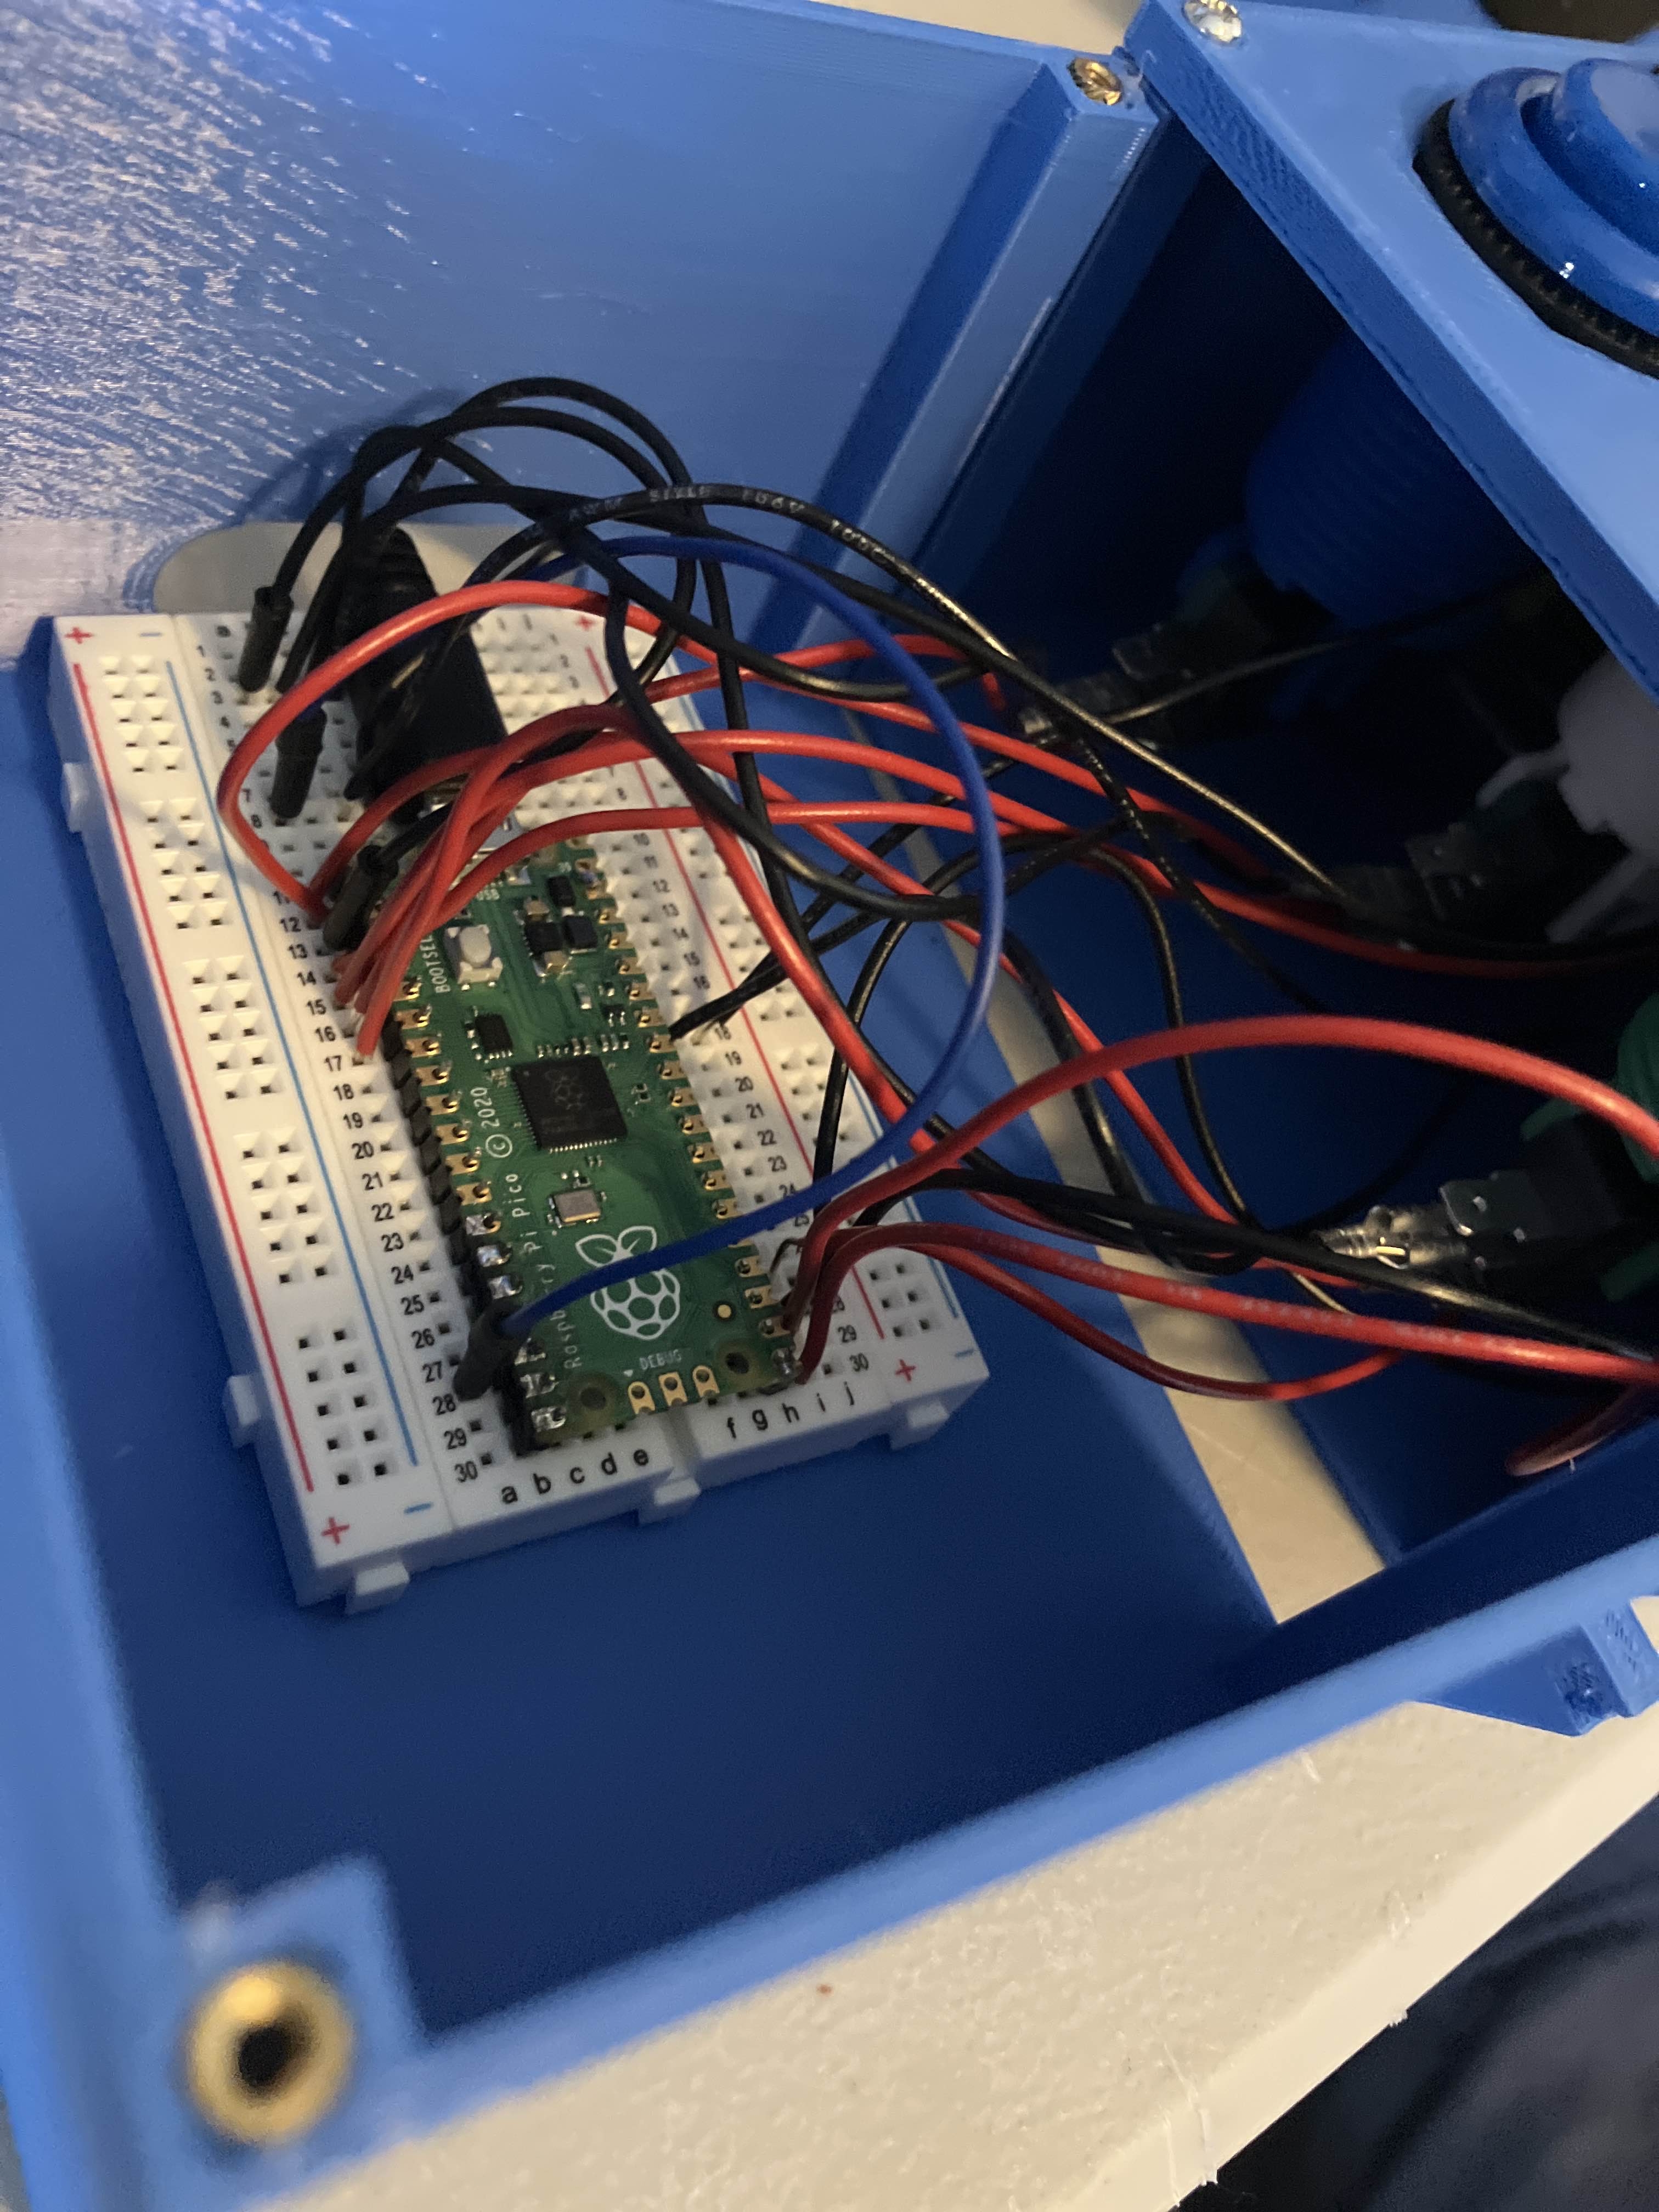
After a while, I had all the buttons connected to the pico through a breadboard. Soldering introduces risk, and both of my soldering irons kind of suck. I tried it with the buttons and... only one of them worked. Or none of them did, I can't remember. This was yesterday, I really should remember. Anyway, I disconnected everything and tried again by soldering. I soldered all 6 buttons and they all worked! Until two of them started acting up. Apparently, unbeknownst to me, my mom had messaged her mom (an electrical engineer) about what I had been doing, and then I heard through my mom that she said I may have overcrimped my wires. As I had checked every other concievable issue, I was excited about this. It made a lot of sense, the connection was there, it just got more and more shaky over time.
Wow would you look at that, the two buttons that were acting up had really crushed wires! Networking is important, who knew. Anyway, I redid those, using up my last spare crimp (thinking about going back to the store for the FOURTH time to get more but it's 30 minutes away so I don't want to). And now? Those 6 buttons work PERFECTLY. Finally, something in this project WORKS. I've been very frustrated by this project, after every failure. Good to have a success.
Later that day (so, still yesterday, Monday) I soldered the joystick and 3 switches, so everything is fully soldered! Not a single switch or joystick input worked correctly. God fucking damn it. 3 hours just completely wasted. Well, it was late at night and I was frustrated with this project that gives me nothing but shit constantly, so I decided to give in for the night.
Tuesday
Now it's today! I do not want to touch this project, it makes me want to never try electronics again (I will). But, I did take a look at it. All the pins look good, (except for two of the wires connecting to the switches, those switches have been nothing but trouble with keeping their wires connected), and I got all the GPIO pin IDs correct. I really will just have to resolder some stuff. I really don't want to though, this project has been 6 times harder than I was anticipating.
(Read this next part in a deep announcer voice)
Tune in next time on this webpage when he might have done more, or remembered something he forgot to write about! Will Tess learn to not have a mental breakdown when a project doesn't work? Will the controller get finished or be abandoned? Will he fry the pico?? Find out only on the Fifty Third Dimension!
Tuesday, 4:15 AM (or ig Wednesday but stfu)
I returned to the project at 23:00 or so, determined to get the joystick working. I fiddled with things and got 2 joystick buttons (the joystick is really 4 buttons in disguise) to work, and then I got 3, and finally I got all 4 to work. Don't know if they'll deteriorate over time though. Then I took out some of the large hot glue blobs covering my work and... I did not... solder these things together at all? The wires weren't touching under the hot glue. Sheesh, I need to stop working on this project at midnight!
After that, I kept working at the switches and checked a lot of stuff. After a while of it not working over and over I decided to give up, I can just comment in and out different versions of the key array and reupload the code. I'm just so fucking sick of this project, it's unbearably frustrating to pour hours into delicate difficult fine motor skill work just for it to go "actually this means nothing and you suck". I don't know why this bothers me so much, but it does.
I also was soldering on it while it was plugged in, and then I briefly connected power to ground. The LED flashed and I heard the windows unplug sound effect. Thankfully, unlike the arduino, the pi pico has safeties so that mentally set back individuals such as myself can make projects! If I fried the pico just then... well, I definitely wouldn't continue this project. I'm pretty bad at telling myself to give up on hobbies because of how crushingly difficult they are. I hope I get proficient enough with electronics that every failure doesn't make me consider smashing my controller to 216 pieces someday. What makes this especially embarrassing is that this is an easy project!! It's just modelling a box, putting some store bought parts on it, and then soldering them to a consumer available product built specifically for this! There's no challenge here, and yet...
Anyway, I decided that having the joystick and buttons was enough, at least for tonight (it's 4 AM) so I closed the whole thing up. Now, this requires kind of smushing the wires. I was worried this would tamper with my electronics. All the buttons, good, down, good, right, good, left, good, okay it seems like I was worrying over nothing- up doesn't work. Yep, lost up. I'd smash it to pieces but it's late and I don't want to wake anyone else in the house. Time to sleep, and tomorrow I'll continue this project like the emotionally stable adult I pretend to be!
Also, typing this entry with the controller connected, it seems to occasionally freeze up my keyboard. One time it left the last key I had pressed continually pressing for 2 seconds before control was given back to me. Ugh. I thought this project would be easy, and when I was proven wrong I thought "well at least when it's done it'll work perfectly", and now I'm realizing even that was unrealistic. Someday, (definitely not within the next 4 weeks though) I want to attempt this project again or something similar, and make it significantly better, and hopefully with significantly less agony.
Well, you don't need the up key to play Super Meat Boy, and you only occasionally need the up key for Spelunky. So I'm gonna play those and then sleep! I'll write here again tomorrow, or whenever I come back to this cursed project.
5:30 AM
WOW!! THAT WAS SO COOL!! It was like playing all my favorite childhood games but at an actual arcade! This is why I torture myself with these terribly difficult projects, yeah the knowledge or whatever but mainly for the end product, because sometimes it's kinda good! I think if I fix the main two issues (it being inconsistent and the joystick getting caught on the internal wiring), I'll unironically use this. So, halfway through my play session (18 minutes or so after I switched from SMB to spelunky) the up direction of the joystick started working, and at around the same time, the bottom white button stopped working. It now registers 1 in every 128 presses. Very frustrating.
Tomorrow, I will take this apart, be more mindful about how it'll close, maybe even hot glue the cable and pi pico to the floor of the device, and if I really feel like it fix the switches (if not I'll remove them), and then this project will be finished! And then I'll be able to use it whenever I like.
Lastly, learning a new controller is difficult. Luckily, it's decently comfortable (could use some foam pads on the edges though, and I wish I could make it shorter), but the button layout could be improved. Thankfully it's not too bad, it's mostly the colors that are the problem. Turns out I like pressing buttons with my pointer finger more than my thumb, so the blue button representing X should really be green, representing A. Other than that, the button layout is fine. I basically got used to playing super meat boy with it (it's a 3 button game) but I probably will never reach the same skill that I have with a controller (moving that big ass joystick around is not as smooth). Spelunky was a lot harder, as it's a 7 button game. I had to ditch the menu button, oh well. These are all things to keep in mind for version two! Or just, the next input device. Doesn't have to be an arcade controller.
Wednesday
I took it apart, and tried to remove the switches. When I desoldered some of the switch connections, some other wires came off with it, which was kind of expected. I tried to solder them back on, and was mostly successful with some effort. For some reason, BOTH of my soldering irons stopped being able to melt solder. I have two soldering irons, one is a death stick that quickly heats to hundreds of degrees celsius and can probably melt the sun, the other barely melts solder at 380C. There's this half millimeter line of solder bridging two pins (the blue button's GPIO to ground). I tried very hard to remove this line but was unsuccessful. Now, I expected this to make the blue button permanently held down, but instead, the blue button just doesn't work any more. ?????????
Also, the white button STILL doesn't work. I see that both of its wires are pretty crushed by the crimps, but the solder connections look good. Also, I looked at the joystick up terminals. One of them was crushed so I snipped it and stripped the end about 2cm, then wrapped the end around the terminal. That... isn't a great connection, and when I tested it yeah it works about the same, if not worse.
However, I was successful in being mindful of how it would close (I didn't have to squeeze it to fit back together) and the wires are now far away from the joystick so they won't get caught anymore!
TLDR: I opened it back up to fix two buttons, they're still broken, but a button that was working now isn't. Trust me, I'm an engineer!
Friday
Aha! You thought I gave up, didn't ya?! Well I did too, and now we BOTH look silly! Alright so, at around 16:00 today, I began working on the project. I tried to fix up some things, and made some silly mistakes. (I cut the wrong wire and so had to resolder an extra wire). Then I had to go to parkour...
Coming back from it, I- nope, me and my family went to a restaraunt.
Now, finally back home, I can work on my project at last! It... was more frustrating solder work that got me no where. I tried using some flux, but it didn't help much at all. Then I watched this lovely tutorial. And boy let me tell you, this REALLY helped. I switched out the tip of my soldering iron for a wedge tip, turned up my soldering iron to 400C, and stopped melting the tin on the iron and then wiping it on the project. These 3 things made soldering feel how it looks in the videos!! Wowie!
After that it was quick work to get every button working consistently. At least, I hope. I've only tested all the buttons for 2 minutes. They might randomly fail after a while. I swear to FUCKING satan if this controller starts acting up in less than 2 years...
I closed up the case, and now I'm going to try it again! All I know for sure is that the joystick is completely out of the way of the wires (the joystick sticks out the other side and used to get caught on wires, I mentioned this earlier but neglected to properly explain). I'll let you know how it goes, and then, hopefully, I'll never have to think about this project again! Honestly, having gotten much better at soldering, and having finished (hopefully) the project, I don't get why I got so frustrated... where's my "hm, this isn't working, I wonder why" attitude when I need it?!
Alright I tried the test again. I howled in despair as the blue button didn't work, but then it started working and wasn't incosistent again for the rest of the 2 minute test. Probably just a start up error, stuff like that happens. All the joystick inputs work perfectly. I did solder to one of the white buttons, and it feels a little weird now, but honestly I think this might be because I twisted it (the buttons kind of work like screws idk why) to make it easier to solder to and forgot to twist it back. I was very careful to not let heat spread back into the button. Anyway gonna play video games now. If it goes perfectly, I won't update this webpage.
Conclusion
I learned a lot about electronics and finishing a project feels amazing, and I'm happy I documented it. It's annoying, but also fun! Now, I didn't make this controller to be less expensive than the commercial versions, but let's tally this up anyway. The average arcade controller on amazon appears to be $60. I bought 7 buttons, each costing around 6 dollars. (42 so far) Then I also bought the joystick, which I don't remember the price of, but let's say 18 dollars. It was probably closer to 8 but let's be conservative here. Now we're at $60. Next, I bought a few reels of wire, but I only used some of it, so let's just say 6 dollars. The pi pico and micro usb to usb cable probably both cost around 6 dollars, so that brings the total to $78. Since some of the ones on amazon were $84, this is not bad at all!